Revitalize Your Home with Restaining Hardwood Floors: A Step-by-Step Guide
Restaining hardwood floors is a popular home improvement project that can have a significant impact on the overall appearance and value of your home. Whether you have recently purchased a home with worn-out hardwood floors or you simply want to update the look of your existing floors, restaining can provide a cost-effective solution. However, the process of restaining hardwood floors can be perplexing and overwhelming for many homeowners. With so many options available, it can be difficult to know where to start.
In this article, we will explore the benefits of restaining hardwood floors, how to choose the right stain, preparing your floors for restaining, step-by-step instructions for restaining, tips for achieving a professional-looking finish. Also we’ll cover how to care for your restained floors, common mistakes to avoid, DIY vs. hiring a professional, restaining on a budget, and enhancing your home’s aesthetic with restained hardwood floors.
Key Takeaways
- Restaining hardwood floors can bring new life to old floors and increase the value of your home.
- Selecting the right stain for your hardwood floors involves considering the wood species, desired color, and finish.
- Preparing your hardwood floors for restaining involves sanding, cleaning, and repairing any damage.
- Restaining your hardwood floors involves applying the stain, allowing it to dry, and applying a protective finish.
- Achieving a professional-looking finish requires attention to detail, proper application techniques, and patience.
The Benefits of Restaining Hardwood Floors
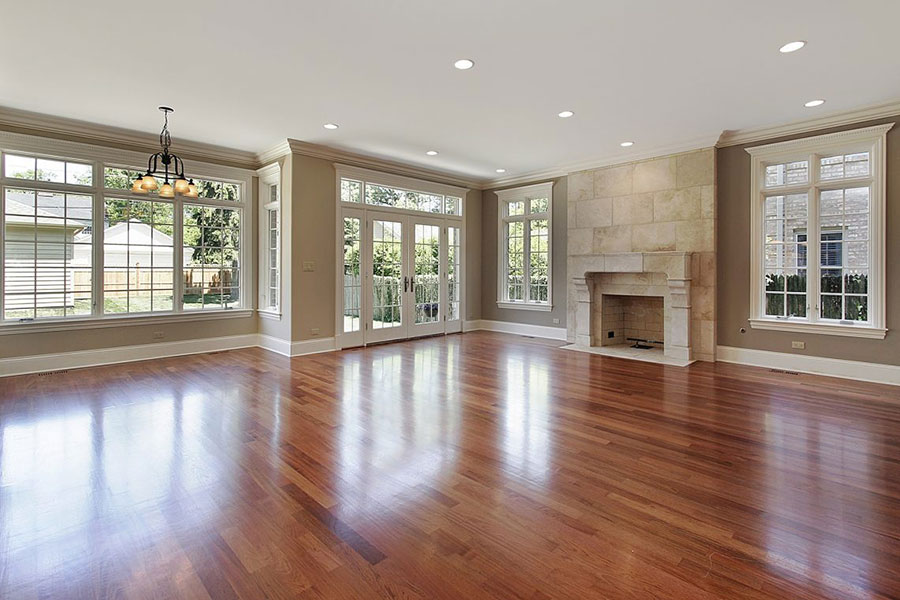
Restaining hardwood floors offers several benefits that make it an attractive option for homeowners. First and foremost, restaining can greatly improve the appearance of your floors. Over time, hardwood floors can become dull and worn-out due to foot traffic, sunlight exposure, and general wear and tear. Restaining can bring new life to your floors by adding depth and richness to the wood grain. Additionally, restaining can also enhance the durability of your floors by providing an extra layer of protection against scratches and stains.
Another major benefit of restaining hardwood floors is that it is a cost-effective alternative to replacing the entire flooring. Hardwood flooring can be costly to install, so if you already have hardwood floors in good condition but are unhappy with their appearance, restaining can be a more affordable option. Restaining allows you to achieve a fresh new look without the hefty price tag of new flooring.
Lastly, restaining hardwood floors can increase the value of your home. Hardwood floors are highly desirable among homebuyers, and having beautifully restained floors can be a major selling point. Potential buyers will appreciate the attention to detail and the added aesthetic appeal that restained hardwood floors bring to a home.
How to Choose the Right Stain for Your Hardwood Floors
Choosing the right stain for your hardwood floors is an important decision that will greatly impact the overall look and feel of your space. There are several factors to consider when selecting a stain, including the type of wood you have, the desired color and finish, and your personal style preferences.
When selecting a stain, it is essential to consider the natural color and grain of your wood. Some woods, such as oak or maple, have distinct grain patterns that can be enhanced with certain stains. On the other hand, woods like pine or birch may have a more subtle grain that can be easily overwhelmed by a dark stain. It is also essential to consider the existing color of your floors and how it will interact with the stain. For example, if you have light-colored floors and want to achieve a darker look, you may need to choose a darker stain or apply multiple coats.
There are many types of stains available on the market, including oil-based stains, water-based stains, and gel stains. Oil-based stains are known for their durability and rich color, but they can take longer to dry and may emit strong fumes during application. Water-based stains are more environmentally friendly and dry quickly, but they may not penetrate the wood as deeply as oil-based stains. Gel stains are thicker in consistency and are ideal for vertical surfaces or for achieving a more even color on blotchy woods.
Popular stain colors and finishes include natural, golden oak, chestnut, espresso, ebony, and gray. Natural stains allow the true color and grain of the wood to shine through, while darker stains like espresso or ebony can create a dramatic and modern look. Gray stains have become increasingly popular recently, as they can add a contemporary and rustic touch to any space. It is important to test the stain on a small, inconspicuous area of your floor before applying it to the entire surface to ensure that you are happy with the color and finish.
Preparing Your Hardwood Floors for Restaining
| Step | Description |
|---|---|
| 1 | Clean the floor thoroughly with a vacuum and mop |
| 2 | Sand the floor to remove the old stain and finish |
| 3 | Fill any gaps or cracks with wood filler |
| 4 | Apply a wood conditioner to ensure even staining |
| 5 | Apply the stain with a brush or roller |
| 6 | Allow the stain to dry completely before applying a finish |
| 7 | Apply a protective finish to the floor |
| 8 | Allow the finish to dry completely before walking on the floor |
Before you can begin the restaining process, it is essential to thoroughly prepare your hardwood floors. This involves cleaning and sanding the floors, filling any gaps or holes, and protecting the surrounding areas.
Start by thoroughly cleaning your floors to remove any dirt, dust, or debris. Sweep or vacuum the floors to remove loose particles, and then use a hardwood floor cleaner to remove any stubborn stains or residue. Make sure to follow the manufacturer’s instructions for the cleaner and avoid using excessive water, as this can damage the wood.
Once your floors are clean, you will need to sand them to create a smooth and even surface for the stain to adhere to. Use a drum sander or a handheld orbital sander with a fine-grit sandpaper to sand the entire surface of the floor. Pay special attention to any areas that may be uneven or have deep scratches. After sanding, vacuum or sweep up any dust or debris.
Next, inspect your floors for any gaps or holes that need to be filled. Use a wood filler or putty that matches the color of your floors to fill in these imperfections. Apply the filler with a putty knife and smooth it out so that it is level with the surrounding wood. Allow the filler to dry completely before moving on to the next step.
Finally, protect the surrounding areas of your home by covering furniture, walls, and baseboards with plastic sheeting or drop cloths. This will prevent any accidental spills or splatters from damaging your belongings.
Step-by-Step Guide to Restaining Your Hardwood Floors
Now that your floors are thoroughly prepared, it is time to begin the restaining process. Follow these step-by-step instructions to achieve a beautiful and professional-looking finish.
1. Apply the stain: Start by applying the stain to a small, inconspicuous area of your floor to ensure that you are happy with the color and finish. Use a brush or a clean cloth to apply the stain in the direction of the wood grain. Work in small sections, applying an even coat of stain to the entire floor. Avoid applying too much stain at once, as this can lead to uneven color or pooling. Allow the stain to penetrate the wood for the recommended amount of time, usually 5–15 minutes.
2. Wipe off excess stain: After the recommended time has passed, use a clean cloth or rag to wipe off any excess stain. This will help to even out the color and remove any streaks or blotches. Make sure to wipe in the direction of the wood grain to avoid creating any additional marks or scratches.
3. Drying and curing time: Allow the stain to dry completely before applying any protective finishes. This can take anywhere from 24–48 hours, depending on the type of stain and the humidity levels in your home. Make sure to follow the manufacturer’s instructions for drying times.
4. Applying a protective finish: Once the stain is dry, it is important to apply a protective finish to seal and protect your newly restained floors. There are several options available, including polyurethane, varnish, or wax. Polyurethane is a popular choice as it provides a durable and long-lasting finish. Apply the protective finish using a brush or roller, working in small sections and following the manufacturer’s instructions for application and drying times. Allow the finish to dry completely before moving furniture back into the room or allowing foot traffic on the floors.
Tips for Achieving a Professional-Looking Finish
Achieving a professional-looking finish when restaining hardwood floors requires attention to detail and proper technique. Here are some tips to help you achieve the best results possible.
1. Proper application techniques: When applying the stain, make sure to work in small sections and apply an even coat. Avoid applying too much stain at once, as this can lead to uneven color or pooling. Wipe off any excess stain to even out the color and remove any streaks or blotches. When applying the protective finish, make sure to follow the manufacturer’s instructions for application and drying times. Work in small sections and use long, even strokes to ensure a smooth and consistent finish.
2. Choosing the right tools: The tools you use can greatly impact the final result of your restaining project. Use a high-quality brush or clean cloth to apply the stain, making sure to choose one that is appropriate for the size of your project. For larger areas, a brush with a wide head or a roller may be more efficient. When applying the protective finish, use a brush or roller that is specifically designed for that type of finish to ensure proper application.
3. Maintaining consistency: Consistency is key when restaining hardwood floors. Make sure to mix your stain thoroughly before applying it to ensure an even color throughout your floors. When applying the stain or protective finish, work in small sections and maintain a consistent application technique to avoid any noticeable variations in color or texture.
How to Care for Your Restained Hardwood Floors
Once your hardwood floors have been restained, it is important to properly care for them to maintain their beauty and durability. Regular cleaning and maintenance are essential to keep your floors looking their best.
Start by sweeping or vacuuming your floors regularly to remove dirt, dust, and debris that can scratch the surface. Use a soft-bristle broom or a vacuum with a hardwood floor attachment to avoid causing any damage. Avoid using a steam mop or excessive water when cleaning your floors, as this can cause the wood to warp or buckle.
In addition to regular cleaning, it is essential to avoid any activities or substances that can damage your restained floors. Place protective pads under furniture legs to prevent scratches and dents, and use rugs or mats in high-traffic areas to minimize wear and tear. Avoid wearing high heels or shoes with sharp objects that can scratch the surface of your floors. Clean up spills immediately to prevent staining or warping, and use a hardwood floor cleaner recommended by the manufacturer for routine maintenance.
Over time, your restained hardwood floors may begin to show signs of wear and tear. When this happens, you have the option to refinish your floors to restore their original beauty. Refinishing involves sanding down the top layer of the wood and applying a new stain and protective finish. This process can be more time-consuming and expensive than restaining, but it can greatly extend the life of your floors and bring them back to their former glory.
Common Mistakes to Avoid When Restaining Hardwood Floors
While restaining hardwood floors can be a rewarding and cost-effective project, there are several common mistakes that homeowners should avoid achieving the best results possible.
One common mistake is over-sanding or under-sanding the floors. Sanding is an important step in preparing your floors for restaining, as it creates a smooth and even surface for the stain to adhere to. However, it is essential not to sand too much or too little. Over-sanding can remove too much of the wood’s natural color and grain, while under-sanding can result in an uneven finish. Make sure to follow the manufacturer’s instructions for sanding and use a fine-grit sandpaper to achieve the desired result.
Another common mistake is applying too much or too little stain. Applying too much stain can result in a dark and blotchy appearance, while applying too little can result in a light and uneven color. It is essential to apply the stain in thin, even coats and wipe off any excess to achieve a consistent and balanced color. Test the stain on a small, inconspicuous area of your floor before applying it to the entire surface to ensure that you are happy with the color and finish.
Skipping protective finishes is another common mistake that homeowners make when restaining hardwood floors. Protective finishes, such as polyurethane or varnish, are essential for sealing and protecting your restained floors. They provide an extra layer of durability and help to prevent scratches, stains, and water damage. Skipping this step can result in premature wear and damage to your floors. Make sure to follow the manufacturer’s instructions for applying the protective finish and allow it to dry completely before allowing foot traffic on the floors.
DIY vs. Hiring a Professional: Which is Right for You?
When it comes to restaining hardwood floors, homeowners have the option to tackle the project themselves or hire a professional. Both options have their pros and cons, and the decision ultimately depends on your personal preferences, budget, and skill level.
One of the main advantages of DIY restaining is cost savings. Hiring a professional can be costly, as you will need to pay for their labor, materials, and expertise. By doing the project yourself, you can save money on labor costs and have more control over the overall budget. DIY restaining also allows you to work at your own pace and make decisions based on your personal style preferences.
However, DIY restaining does require a certain level of skill and knowledge. Restaining hardwood floors can be a time-consuming and physically demanding project that requires attention to detail and proper technique. If you are not confident in your abilities or do not have the necessary tools and equipment, it may be best to hire a professional. Professionals have the experience and expertise to ensure a high-quality finish and can often complete the project more quickly and efficiently than a DIY homeowner.
When deciding whether to DIY or hire a professional, it is important to consider the size and complexity of your project, your budget, and your personal skill level. If you have a small area to restain and feel comfortable with the necessary steps and techniques, DIY may be a viable option. However, if you have a large area to restain or are unsure of your abilities, it may be best to hire a professional to ensure a beautiful and long-lasting finish.
Restaining Hardwood Floors on a Budget
Restaining hardwood floors does not have to break the bank. There are several cost-saving tips and DIY options available for budget-conscious homeowners.
One cost-saving tip is to do the project yourself instead of hiring a professional. As mentioned earlier, DIY restaining can save you money on labor costs and give you more control over the overall budget. By doing the project yourself, you can also choose more affordable materials and supplies that fit within your budget.
Another cost-saving tip is to choose a less expensive stain or finish. While high-end stains and finishes may offer superior quality and durability, they can also come with a higher price tag. Consider opting for more affordable options that still provide the desired color and protection for your floors. It is important to balance cost savings with quality to ensure that you are getting the best value for your money.
If you are interested in learning a new language, there are several effective methods you can try. One approach is to enroll in a language course at a local community college or language institute. These courses typically provide structured lessons and opportunities for practice with other learners. Another option is to use language learning apps or online platforms, which offer interactive exercises and resources for self-study. Additionally, immersing yourself in the target language by watching movies, listening to music, or reading books can greatly enhance your language skills. Finally, finding a language exchange partner or joining a conversation group can provide valuable opportunities for speaking and practicing the language with native speakers. Overall, combining these methods and consistently dedicating time to practice will help you make significant progress in learning a new language.
If you’re looking for tips on how to restain your hardwood floors, look no further! We have a fantastic article that covers everything you need to know about this process. From choosing the right stain color to preparing the floors and applying the stain, our step-by-step guide will ensure your hardwood floors look brand new. Don’t miss out on this valuable resource – check out our article on restaining hardwood floors today!
FAQs
What is restaining hardwood floors?
Restaining hardwood floors is the process of removing the existing stain and applying a new one to restore the color and shine of the wood.
Why should I restain my hardwood floors?
Restaining hardwood floors can improve the appearance of your floors, making them look new again. It can also protect the wood from damage and extend its lifespan.
How often should I restain my hardwood floors?
The frequency of restaining hardwood floors depends on the amount of foot traffic and wear and tear they receive. Generally, it is recommended to restain hardwood floors every 5–10 years.
Can I restain my hardwood floors myself?
Restaining hardwood floors is a complex process that requires specialized tools and expertise. It is recommended to hire a professional to ensure the job is done correctly.
How long does it take to restain hardwood floors?
The time it takes to restain hardwood floors depends on the size of the area being restained and the complexity of the job. Typically, it takes 2-3 days to restain hardwood floors.
What is the cost of restaining hardwood floors?
The cost of restaining hardwood floors varies depending on the size of the area being restained, the type of stain used, and the complexity of the job. Typically, it costs between $3 and $5 per square foot to restain hardwood floors.


